Website Documentation for Students
This documentation provides a comprehensive overview of the various functions specifically tailored to the needs of students.
1 Navigation Bar
At the very top of the website is the navigation bar, which consists of several buttons. These buttons provide various settings and tools for the user-friendliness and functionality of the website.

1.1 Choose Theme
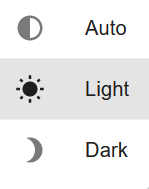
- Description and Application: This button allows you to customize the appearance of the website. Click the "Choose Theme" button and select the desired option from the dropdown menu.
- Options:
- Darkmode: Switches the website to a dark color scheme.
- Lightmode: Switches the website to a light color scheme.
- Automode: Adopts the preferred display setting of the student's browser (light or dark).
1.2 Choose Language
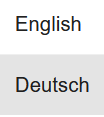
- Description and Application: This button allows you to change the language of the website. Click the "Choose Language" button and select the desired language from the dropdown menu. The website will automatically be translated into the selected language.
- Options:
- German: Switches the website to the German language.
- English: Switches the website to the English language.
1.3 Help
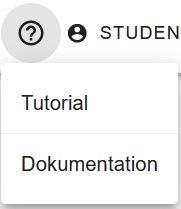
- Description and Application: With this button, you can open a dropdown menu where you can choose either a tutorial (a short guide on how to choose elective subjects) or the documentation (a detailed description of the website).
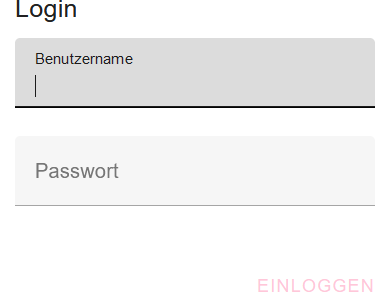
1.4 Login
- Description and Application: This button allows you to log in to the website using your username and password. Click the "Login" button. An input mask will open where you can enter your username and password. After successful entry, you will be logged in and have access to your personal data and functions.
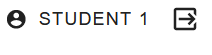
1.5 Logout
- Description and Application: Once the login is complete, the student's username is displayed in the navigation bar, and the Login button turns into a Logout button, which the student can use as needed.
This navigation bar is a central part of the website and provides quick access to important functions that improve the user experience.
2 Functions for Elective Subjects (Wahlpflichtfächer)
2.1 Search Function
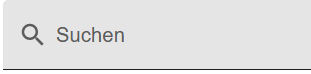
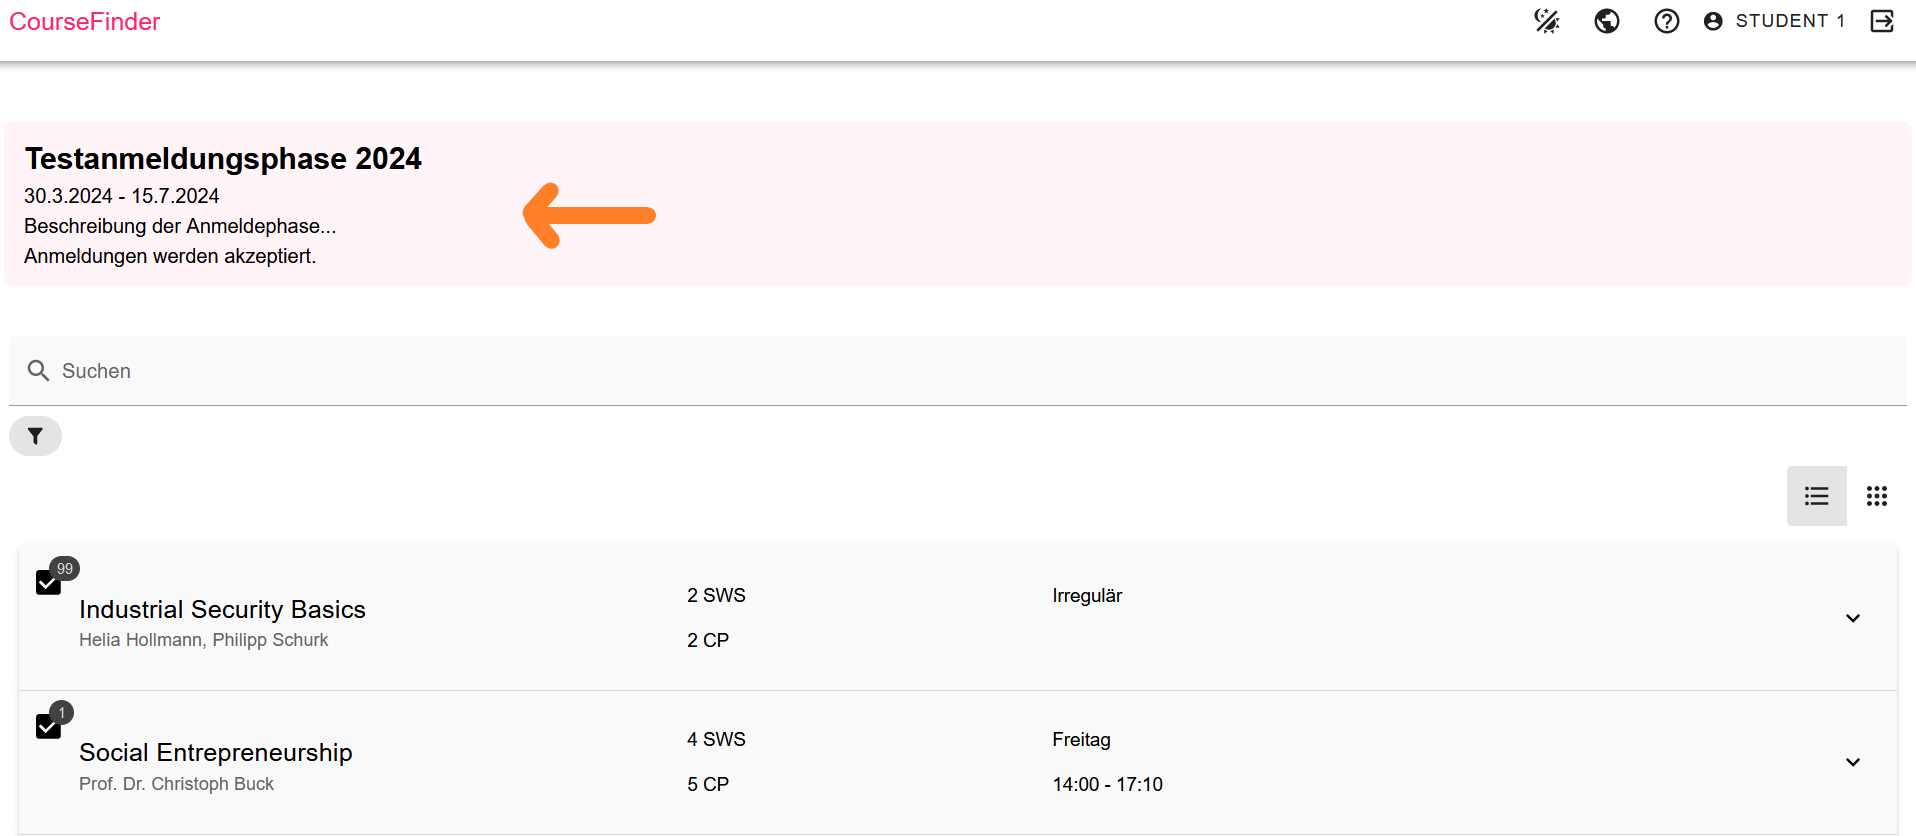
Students can search for elective subjects using a search bar containing a magnifying glass icon if they know the name of the elective subject.
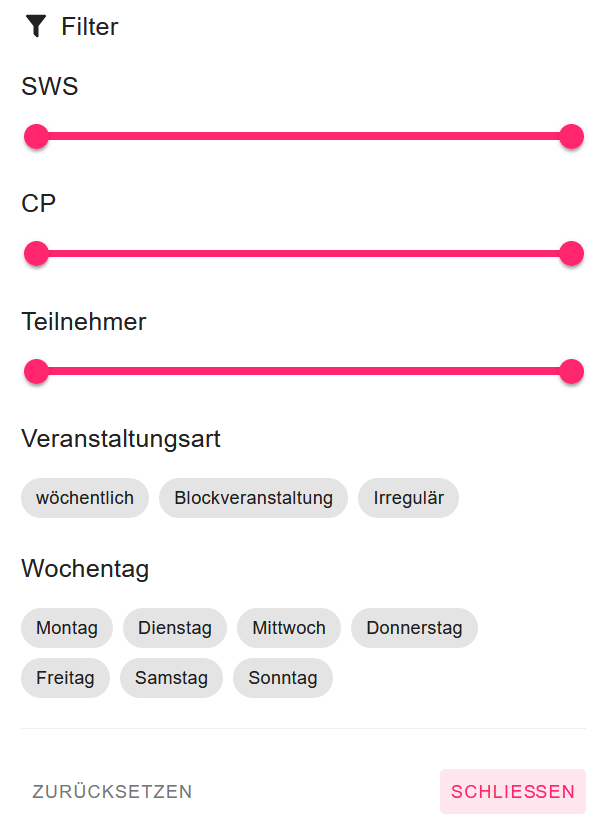
2.2 Filter Function
The filter function allows students to set specific criteria to narrow down the selection of elective subjects. The following filters can be set: Weekly contact hours (0-20 SWS), Credit Points (0-20 ECTS), maximum number of participants (0-100), type of event (weekly, block seminar, irregular), and the day of the week. With these, students determine the total weekly hours and credit points they are aiming for. Depending on the criteria specified in the filter, only the elective subjects that meet these criteria will be displayed. To set the filters, students select the corresponding values in the filter options and confirm their selection. The list of elective subjects is updated automatically and shows only the relevant results.
2.3 Customizing the View
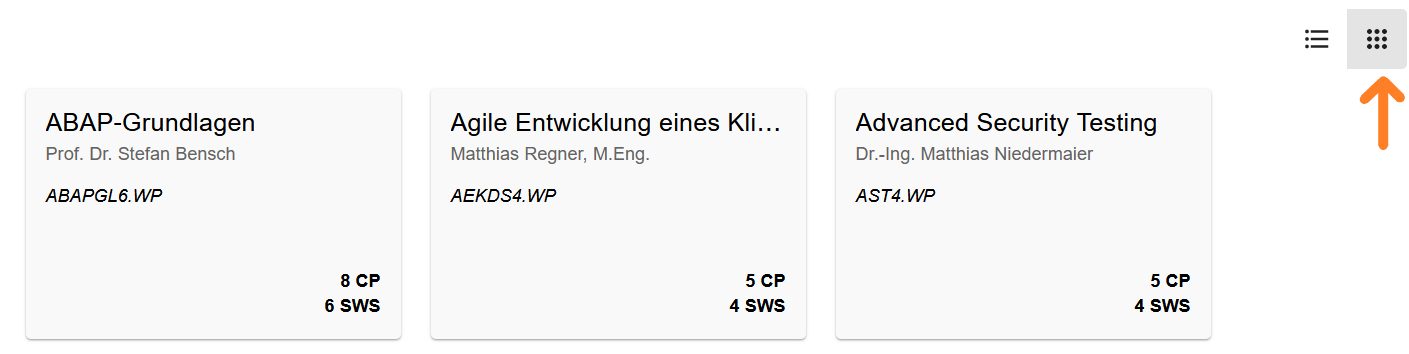
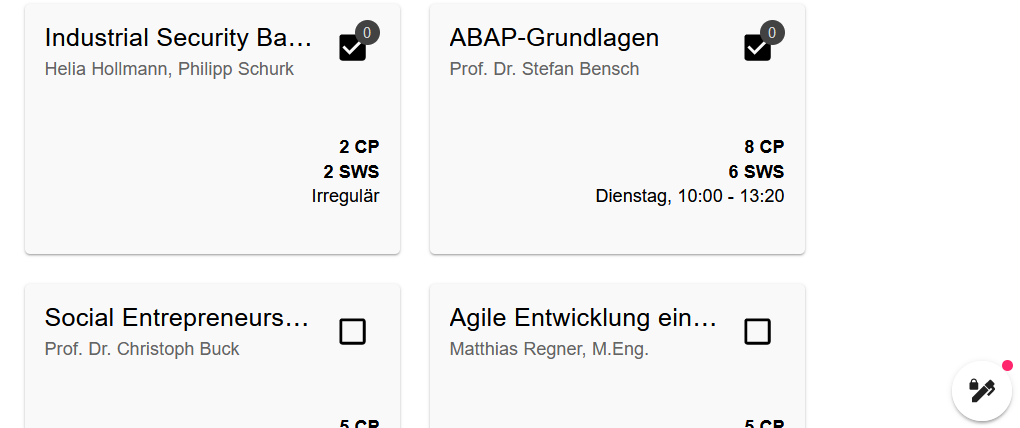
Additionally, there are two buttons with which the student can change the display of the elective subjects. Clicking the button with the three horizontal lines (Menu Button) displays the elective subjects row by row.
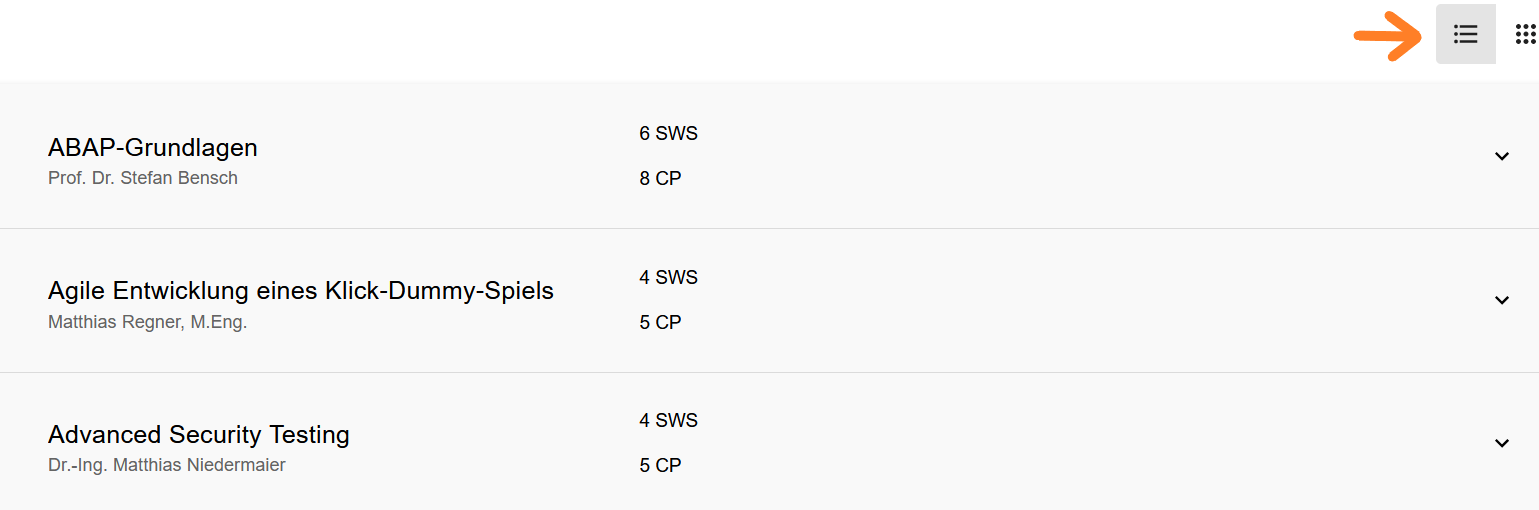
However, clicking the button with the 3x3 dots (Dots-Grid Button) displays multiple elective subjects in a single row.
3 Elective Subjects: Information, Registration, and Changes
3.1 Detailed Information on Elective Subjects
When a student clicks on an elective subject, a pop-up window opens showing the following information:
- Lecturers
- Workload: Weekly contact hours (SWS) and Credit Points (ECTS)
- Maximum number of participants
- Dates: Day, date, and time
- Notes: Information such as excursions on specific dates or online lectures on certain days
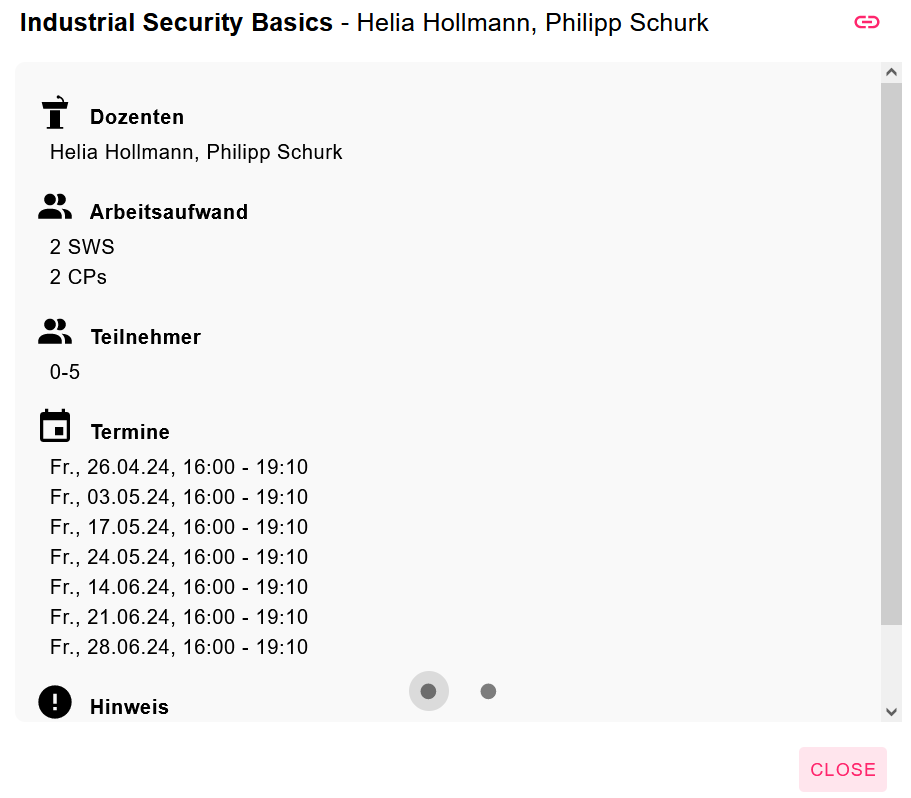
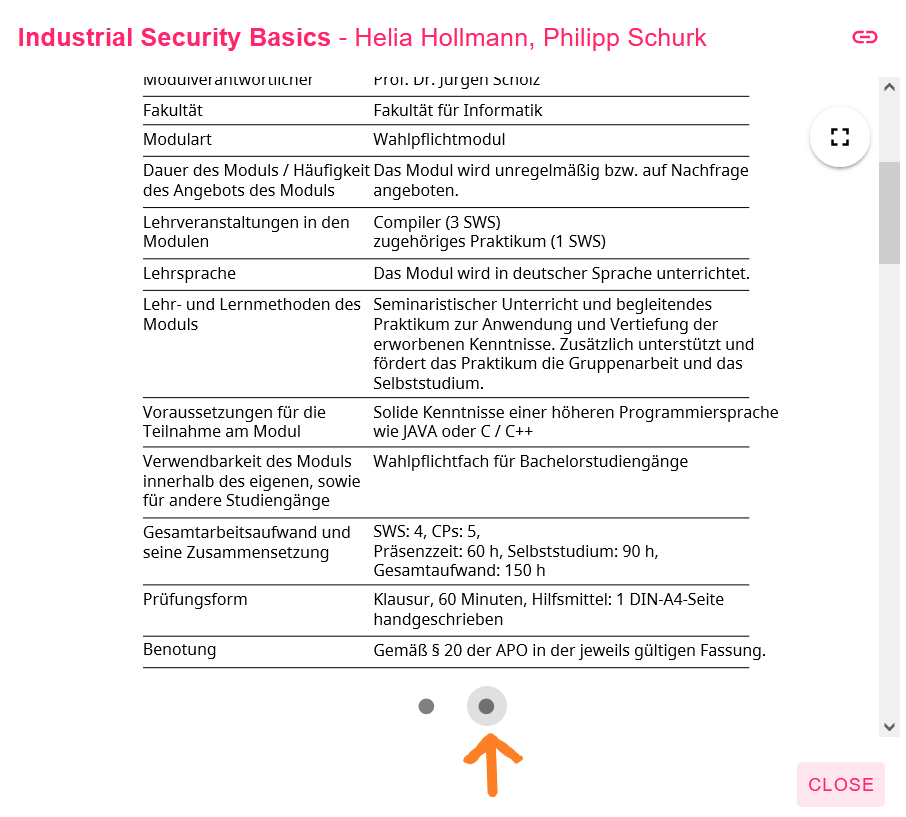
If the student wants more precise information about the respective elective subject, they must click a circular button at the bottom of the pop-up window. This will display an excerpt of the module handbook within the same pop-up window, containing only information relevant to that specific subject.
3.2 Registration for Elective Subjects
The registration for elective subjects basically consists of two phases: choosing the subjects you want to register for and prioritizing those elective subjects.
Phase 1: Selection of Elective Subjects
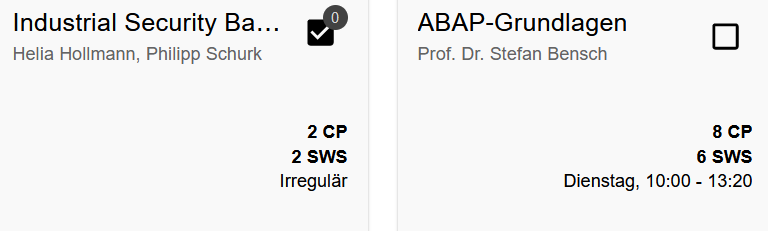
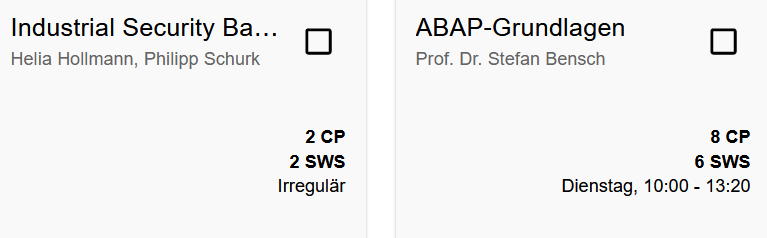
- Selecting Subjects: The student can select elective subjects by clicking the checkbox. Whether a subject has been selected is indicated by a checkmark (selected) or no checkmark (not selected) in the checkbox. Additionally, there is a number above the checkbox; this represents the prioritization, which will be explained in more detail below.
- Deselecting Subjects: If the student decides they no longer want to take an elective subject, they can click the checkbox again to clear the selection.
Phase 2: Prioritizing Elective Subjects
- Requirement: Prioritization is only possible if at least one elective subject was selected in the first phase. Only then will a button shaped like a pen be displayed in the lower right corner of the website.
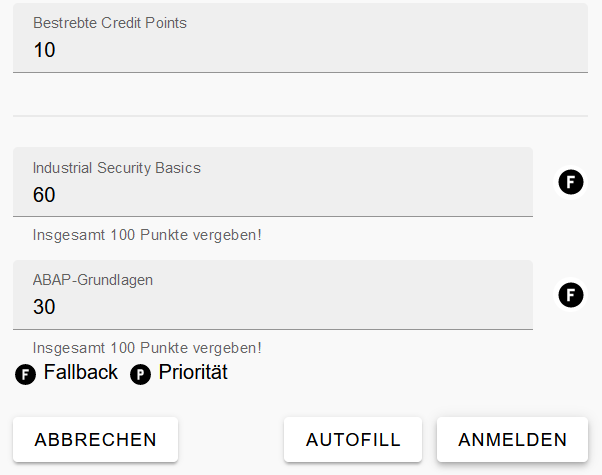
- Opening the Prioritization Window: When the student clicks the button, a pop-up window appears. This shows the targeted credit points as well as the previously selected elective subjects. Initially, the digit 0 appears under the names of the elective subjects, meaning no prioritization has been made yet.
- Setting Priorities: To set priorities, a positive number between 0 and 100 must be assigned to each subject. The higher the number, the higher the priority of the respective elective subject. In total, all selected subjects must add up to exactly 100 points; otherwise, registration is not possible. Attempting to register without correct prioritization will result in an error message: "Assign a total of 100 points!".
Optional: Automatic Point Distribution (Autofill)
- The student has the option to use the "Autofill" button to distribute the points automatically. The automatic distribution happens differently depending on the type of subject. One can distinguish between a Priority Elective and a Fallback Elective; these can be toggled by clicking the "B" or "P" button next to the respective subject.
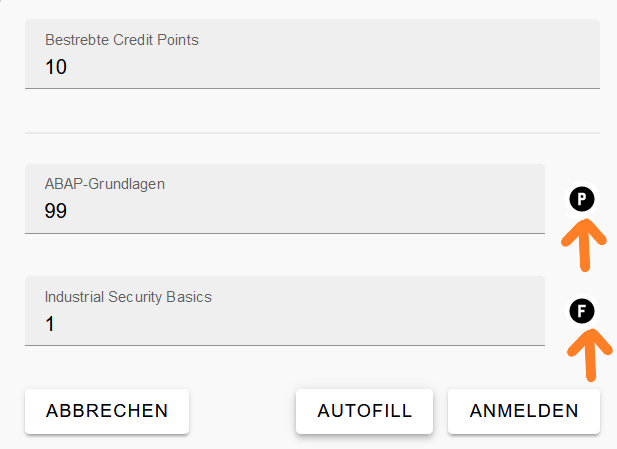
Priority Elective: These subjects have a high priority and should be preferred.
Fallback Elective: These subjects serve as a safety net in case you do not receive any of the Priority Electives.
Case 1 - Only Priority Electives: Suppose two elective subjects are selected, and both are marked as Priority Electives. If the student clicks the "Autofill" button, the 100 points are distributed equally among the number of selected subjects. In this case, both receive 50 points.
Case 2 - Mixed Priority and Fallback Electives: If Fallback Electives are used and the "Autofill" button is clicked, the distribution is as follows: Suppose two subjects are selected, one being a Fallback Elective and the other a Priority Elective. In this scenario, the Fallback Elective receives 1 point, and the Priority Elective receives 99 points. Fallback subjects always receive exactly 1 point when using "Autofill," as they are meant to ensure the student gets at least the Fallback subject if they miss out on their Priority subjects (the "worst-case" scenario). It therefore makes sense to give the Fallback subject the lowest possible score (1 point).
Completing Registration: Once the student has distributed the priorities so that they total 100 points, registration can be completed via the "Register" (Anmeldung) button within the pop-up window.
3.3 Changes and Withdrawals
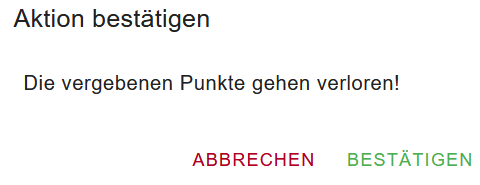
- Changes: If the student wants to make changes later, such as deselecting an elective subject, they must click the checkbox of the respective subject. A pop-up window will appear informing them that this action will cause the assigned points to be lost.
- Confirming Deselection: If the student confirms the action, the points of the deselected elective subject are redistributed equally among the remaining selected elective subjects.
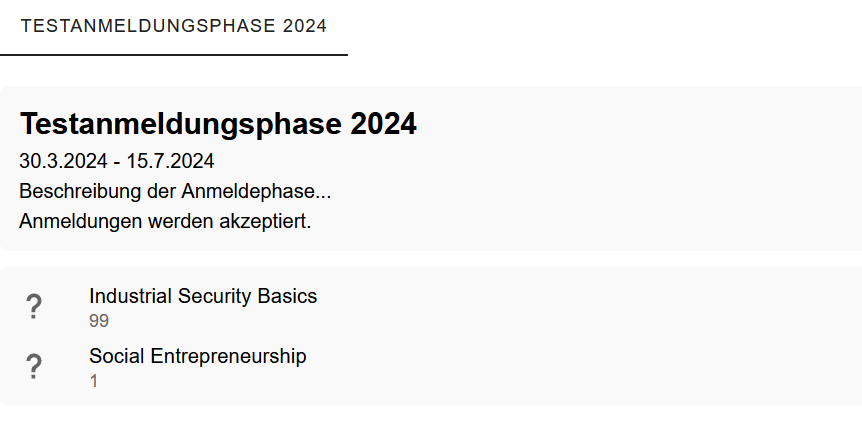
4 Viewing the Results of the Elective Subject Allocation
To see which elective subjects have been assigned after the allocation process, the student must click on the bar below the navigation bar.
Once the bar is clicked, the student is taken to a view that displays which elective subjects have been assigned to them. If a question mark appears next to an elective subject, it means the allocation has not yet taken place.